![]() |
![]() |
![]() |
||||||||||||||||||
![]() |
![]() |
|||||||||||||||||||
Anatomy |
||||||||||||||||||||
![]() |
||||||||||||||||||||
![]() |
||||||||||||||||||||
![]() |
![]() |
![]() |
||||||||||||||||||
![]() |
![]() |
![]() |
![]() |
![]() |
![]() |
![]() |
![]() |
![]() |
![]() |
![]() |
![]() |
![]() |
![]() |
![]() |
![]() |
![]() |
![]() |
![]() |
![]() |
![]() |
![]() |
![]() |
![]() |
![]() |
|||||
![]() |
![]() |
![]() |
![]() |
![]() |
![]() |
![]() |
![]() |
![]() |
![]() |
||||||||||
![]() |
||||||||||
![]() |
||||||||||
![]() |
||||||||||
![]() |
||||||||||
![]() |
||||||||||
![]() |
||||||||||
![]() |
||||||||||
![]() |
||||||||||
![]() |
![]() |
![]() |
![]() |
![]() |
![]() |
![]() |
![]() |
![]() |
![]() |
![]() |
![]() |
||||
![]() |
||||
![]() |
![]() |
![]() |
![]() |
![]() |
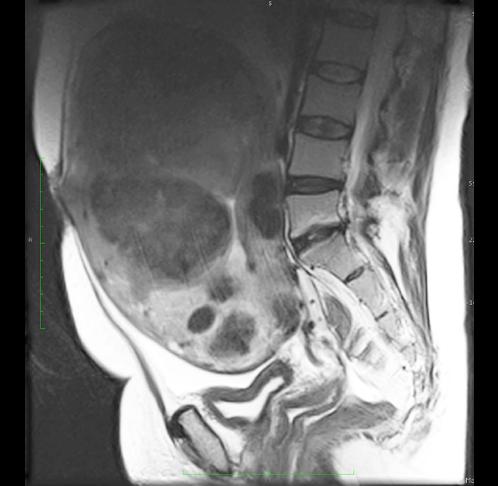
Image A on the previous page was an axial T1-weighted image showing a large mass filling the lower abdomen. Image B (and the image shown above) are from a sagittal T2-weighted sequence (fluid in the bladder is high in signal). The T2-weighted sequence shows more internal detail in the massively enlarged uterus, with multiple rounded masses consistent with fibroids.